
Basic Rifle Set Up
I often get asked for the ideal basic rifle set up. Usually the person asking tells me that they do not want anything crazy and that they are not looking to spend tons of money. My first question in return is typically “what are you looking to do with this rifle?” Most of the time the guy is looking to start taking classes from time to time and wants to use it for home defense. I imagine that when someone is looking for those two uses, the rifle is going to see somewhere around 500 rounds in its first year of life. After the first year, it will probably do more sitting around than anything else and maybe see 100 rounds a year at some sketchy indoor range. Conversely, there are a few guys that get the itch. They start taking some classes here and there and hit the range at least once a month. At some point, those guys feel they need to buy a “better” rifle. As the guy making the initial recommendation, I would really like it if they never felt that way. There are tons of great rifles out there and many of them have attractive price tags. In my opinion, I think a great place to start is with a BCM. You will never need to “upgrade” your rifle set up which will save you money in the long run. Some people will argue that a BCM is too much to spend on a first rifle. In some very rare and specific circumstances I would agree. However most of the people asking me for my opinion on a rifle build spend about five thousand dollars a year on fantasy football.
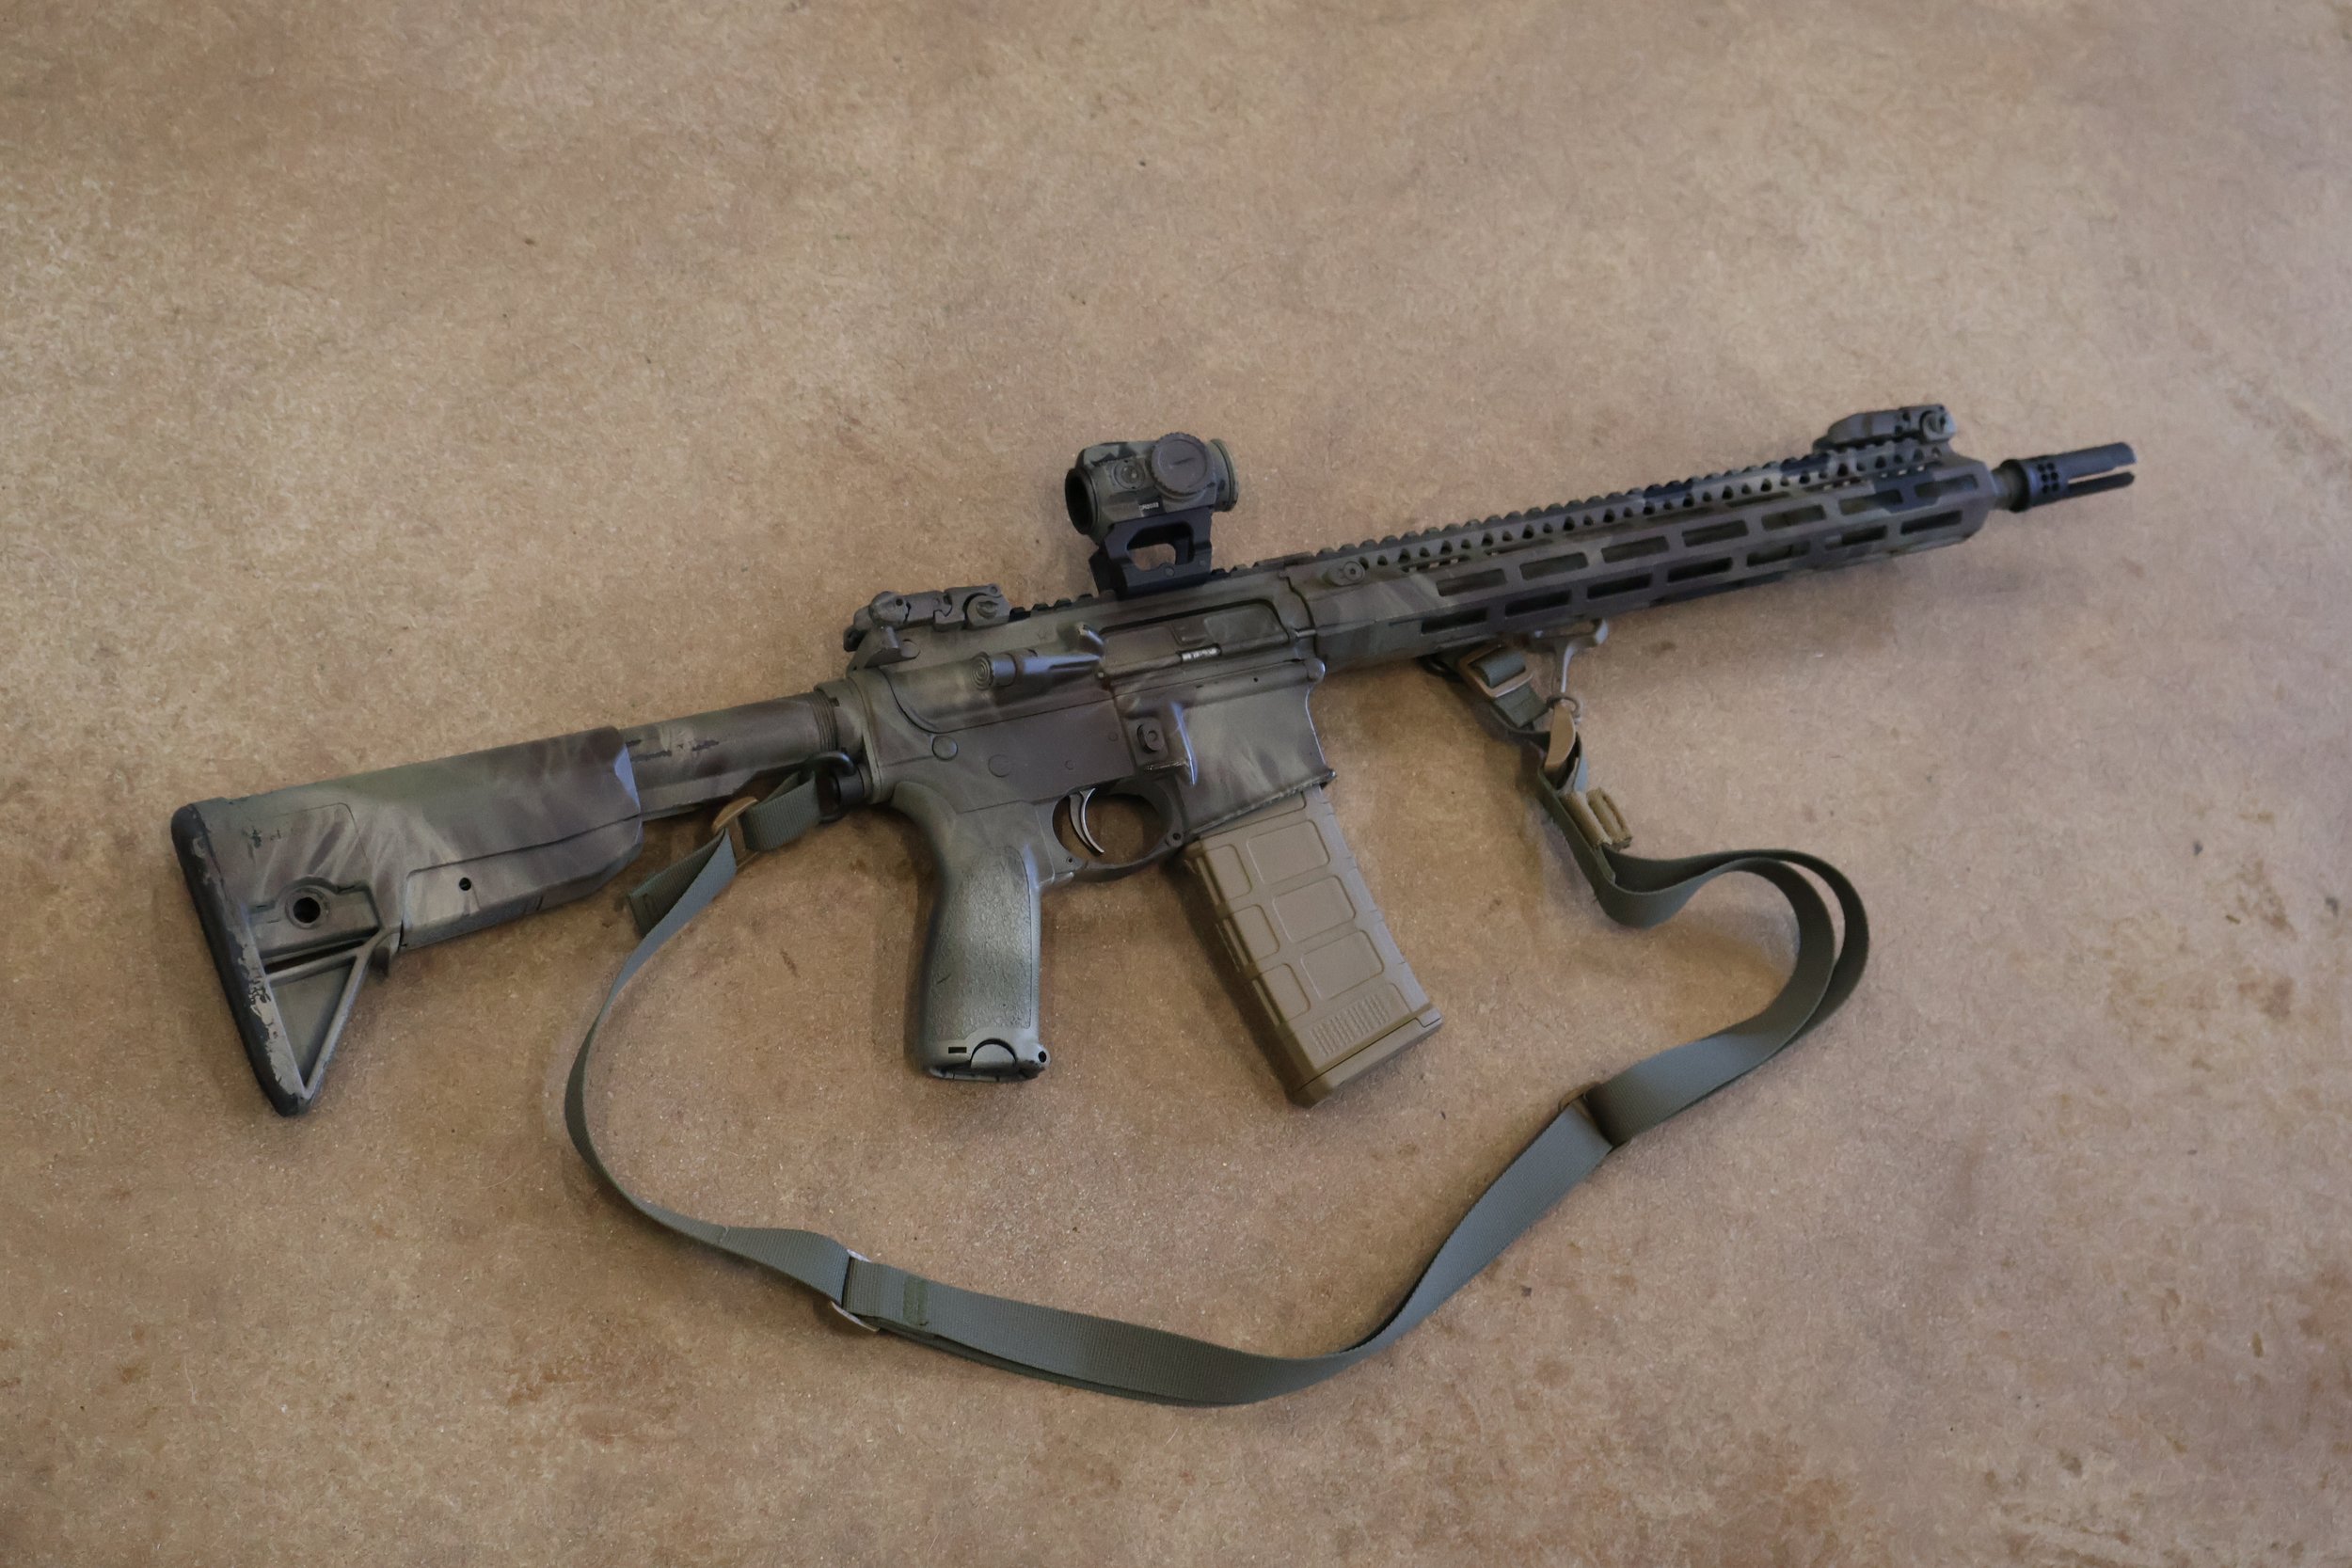
The build pictured has a specific set of criteria. I wanted a rifle that I could use while teaching classes (not my work rifle) and that would be similar to what the students were shooting. Nothing pisses me off more than when the instructor is saying that all of the modifications to a firearm don’t help the shooter while they hold a custom ported and stippled Glock 17. I wanted the basics, a quality rifle with a sling, backup irons, and an affordable red dot. While I believe a flashlight is super important on almost every weapon, I elected to keep this rifle bare.
Being that complete BCM rifles are hard to come by, you are going to need to buy the lower and upper separately. This also opens the door to saving even more money and building the lower on your own. If building the lower receiver is something that intimidates you, it shouldn’t. It's fairly simple to do and while a couple of specialty tools make the job easier, they are not required. There are plenty of great videos on Youtube that will walk you through the entire process.
The BCM upper that I purchased for this build is a MK2 Standard 14.5" Mid Length Complete Upper and it was $831. I believe the 14.5 is a great option for a “do it all rifle” and I wanted to give the MK2 upper a try. If you are looking for a BCM upper, make sure to check out some of the sales they have on blem uppers. These uppers have cosmetic blemishes and BCM sells them with a steep discount. I have had the opportunity to inspect three blemmed BCM uppers and could not find a single flaw. In addition to picking up the upper receiver from BCM, I purchased a BCM Enhanced Lower Parts Kit for $119 and BCM Stock Kit for $113.
The lower receiver for this build is a good ole poverty pony. Anderson Manufacturing Lowers are more than good enough for this build. I also happened to have one laying around that needed a home. You can absolutely get some fancy lower but I do feel that this is an opportunity to save some money. I'm sure if you break down the specs of different manufacturers you may find some tiny difference that some keyboard warrior will cling onto. If that's you then let it rip. It ain't me. You can find Anderson Lowers at most gun shops and they usually will run you about $100. This is the serialized part of the rifle so this is the only part of the build that you can't order online and ship right to your doorstep.
The next purchase for this build was the Magpul Flip Up Sights. If iron sights are going to be your primary sights, I would recommend going with the MBUS Pro’s. The Pro’s are metal and more robust.


For a sling, I went with the tried and true Edgar Sherman Designs. This sling is on all of my rifles and I have never had an issue with it. Of course you will also need to purchase two quick detach sling swivels. Because the rail I purchased utilizes M-Lok, I grabbed an MLOK QD Sling Mount.
You could end your build there and just run iron sights. I think there is value in understanding how to use iron sights before moving on to a red dot or magnified optic. Having said that, it is absolutely not required. Since most people are looking for a red dot on their rifle, I elected to do the same with this build considering its purpose. To keep cost down and maintain quality, I purchased a Vortex Spark Solar for about $230. I understand that there are much more reliable optics out there however the spark is more than capable for this application. One of the biggest complaints about this optic is the mount. The mount is not the strongest and has been known to bend under heavy loads. To combat this, I got rid of the mount it came with and put it on a Scalar Works mount. If you are looking for something that is good to go right out of the box, I would take a look at the Sig Sauer ROMEO4XT. It is more expensive but you wont have to replace the mount either.


If I were to be purchasing a flashlight for this rifle, it would no doubt be the Streamlight ProTac Rail Mount II. The ProTac has been mounted to a bunch of my work rifles with very little issues. A common issue with this light is that the included pressure pad leaves a lot to be desired. The connection from the pad to the tail cap of the light housing is poor and requires some finagling from time to time. To the Surefire people, I also have a $350 Surefire Scout Mini Pro that doesn't work properly.
The last thing I did to this rifle was paint it with Camo Paint. If you're not sure if you want to paint your rifle or not, I highly recommend watching this video by Dirty Civilian. The paint is cheap and can be used for tons of different gear.
The total price for this build is approximately $1750.00. You could save some money on the optic and mount but be careful not to waist your money on garbage. If you are looking for a different dot than the one I used, check out this video by T.Rex arms.
If you have any questions about this build or any other gear, feel free to reach out to me at Brian@BlueTrailConsulting.com.